How To Create A Profile And Mint Metaverse NFT’s On The Sandstorm Marketplace.
On the Sandstorm platform you can mint assets compatible with multiple metaverse platforms and build your own custom profile to showcase your work or find a builder to work with that suits your projects needs.
Step 1: Connect Metamask Wallet To Sandstorm Marketplace
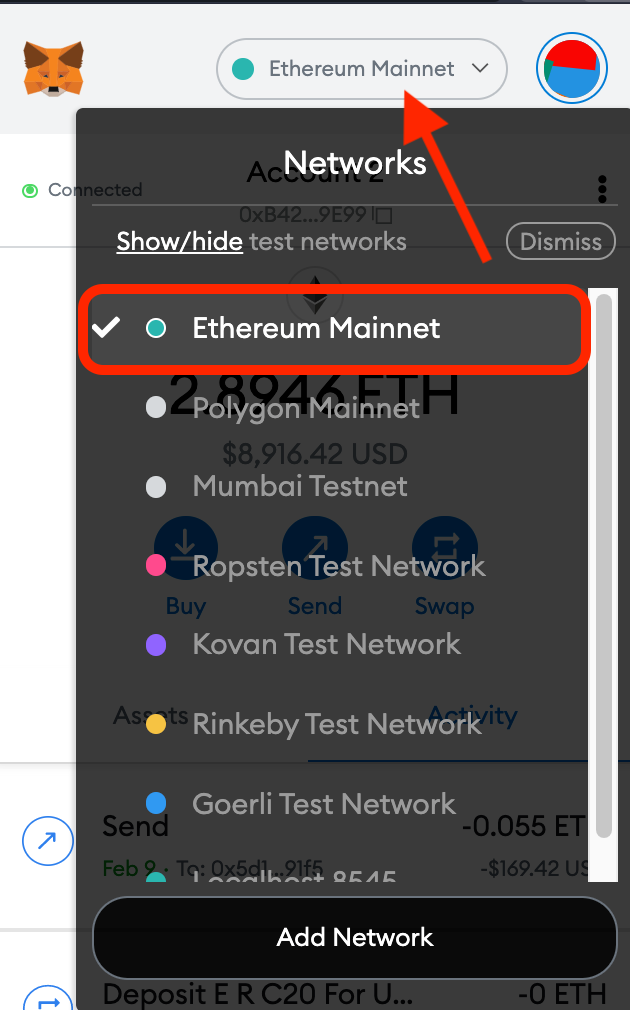
Visit The Sandstorm Marketplace website and login using MetaMask wallet chrome extension connected to the ETH Mainnet.
NOTE: See this article for more information about installing and setting up your Metamask wallet for the first time.
Step 2: Selecting Polygon/MATIC Network
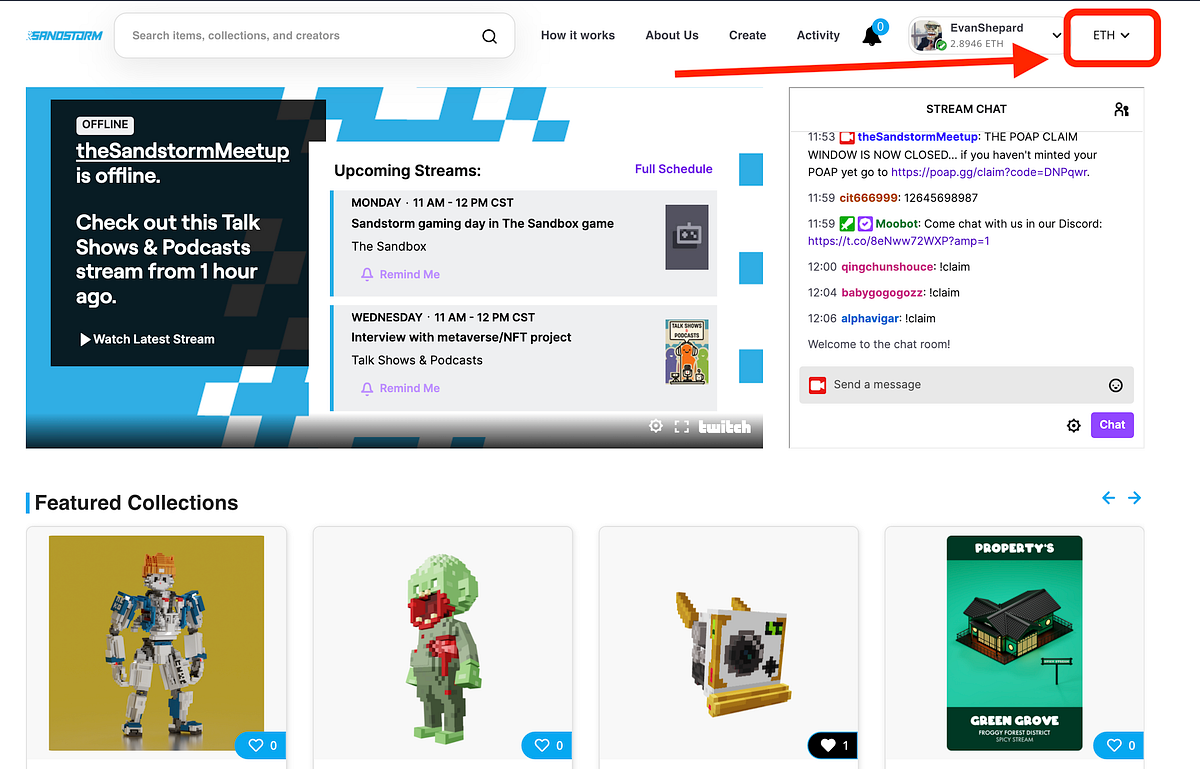
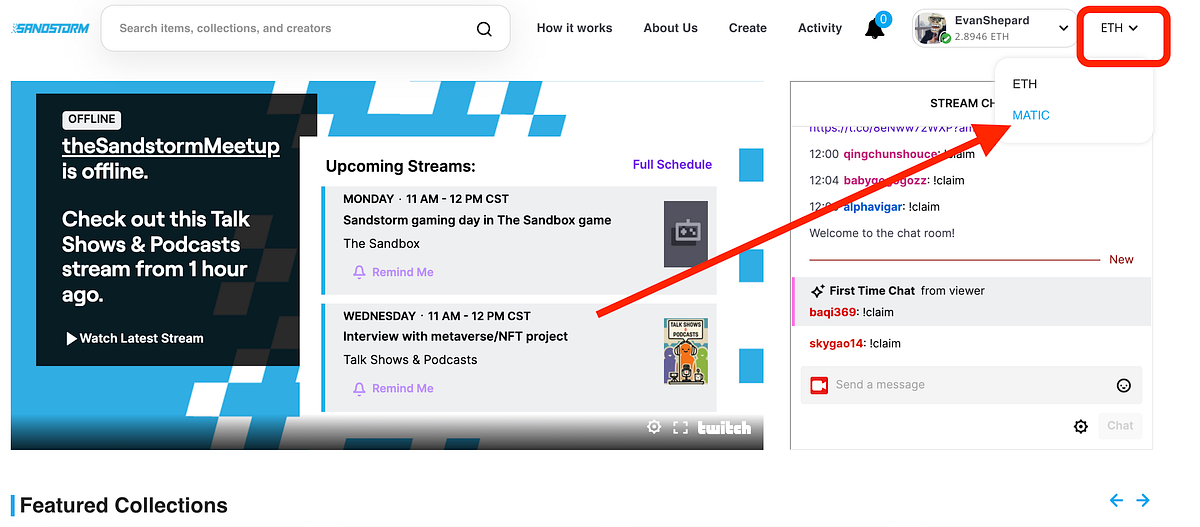
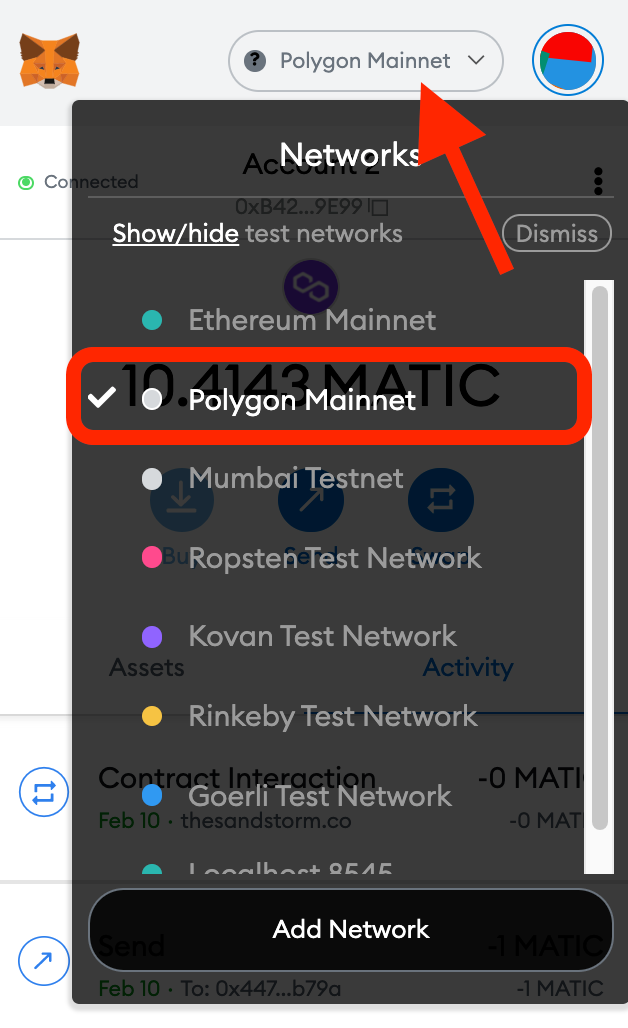
You can also change the marketplace to the Polygon network by selecting the dropdown and changing to the MATIC network option. After changing the marketplace to MATIC, you will need to then change your Metamask network to polygon mainnet as well.
NOTE: To add the Polygon network to your Metamask wallet, simply visit Polygonscan website, scroll to the bottom of the homepage, and click “add polygon network” button and follow the steps in Metamask to approve adding the network to the wallet.

Step 3: Create Profile
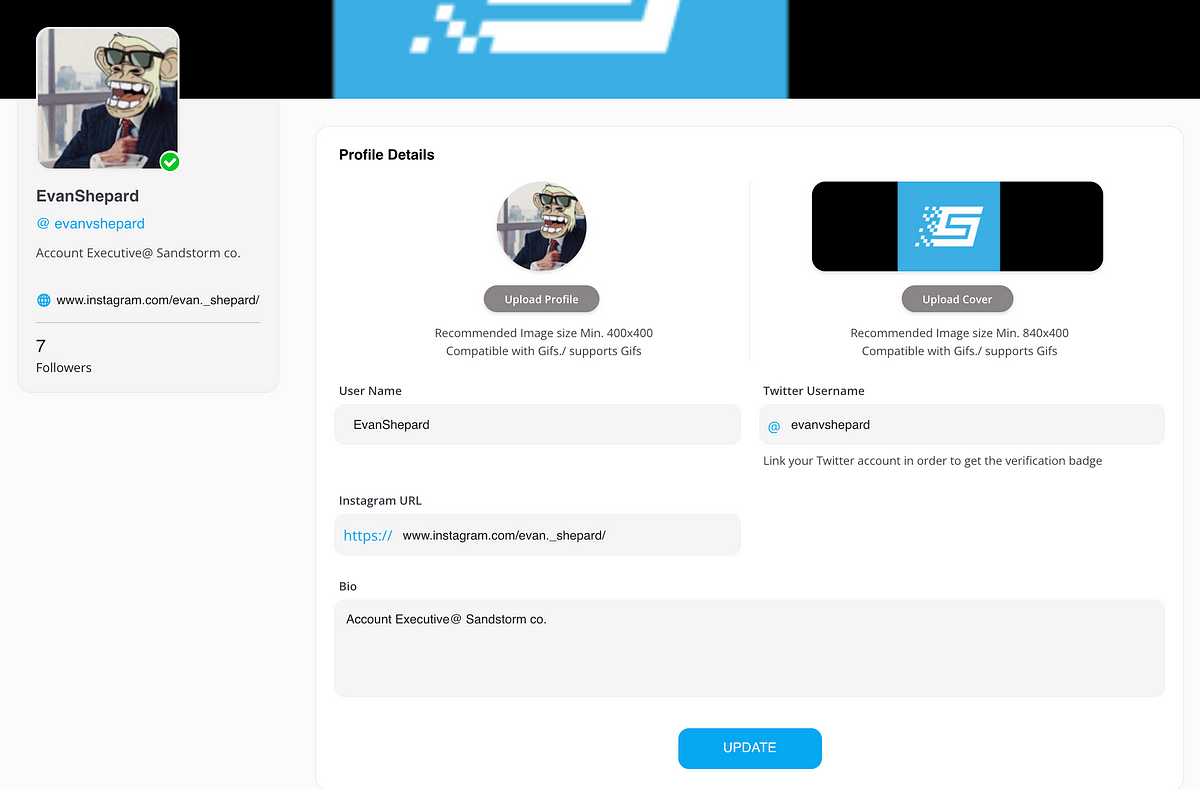
Once you log into the marketplace with Metamask connected your profile will have been created using the ETH/Polygon address from your wallet, but you will still need to complete your personal details on your profile such as Avatar/Profile Pic, Username, Personal contact info, cover photo, account bio, etc…
Step 4: Minting An NFT To Your Profile Page
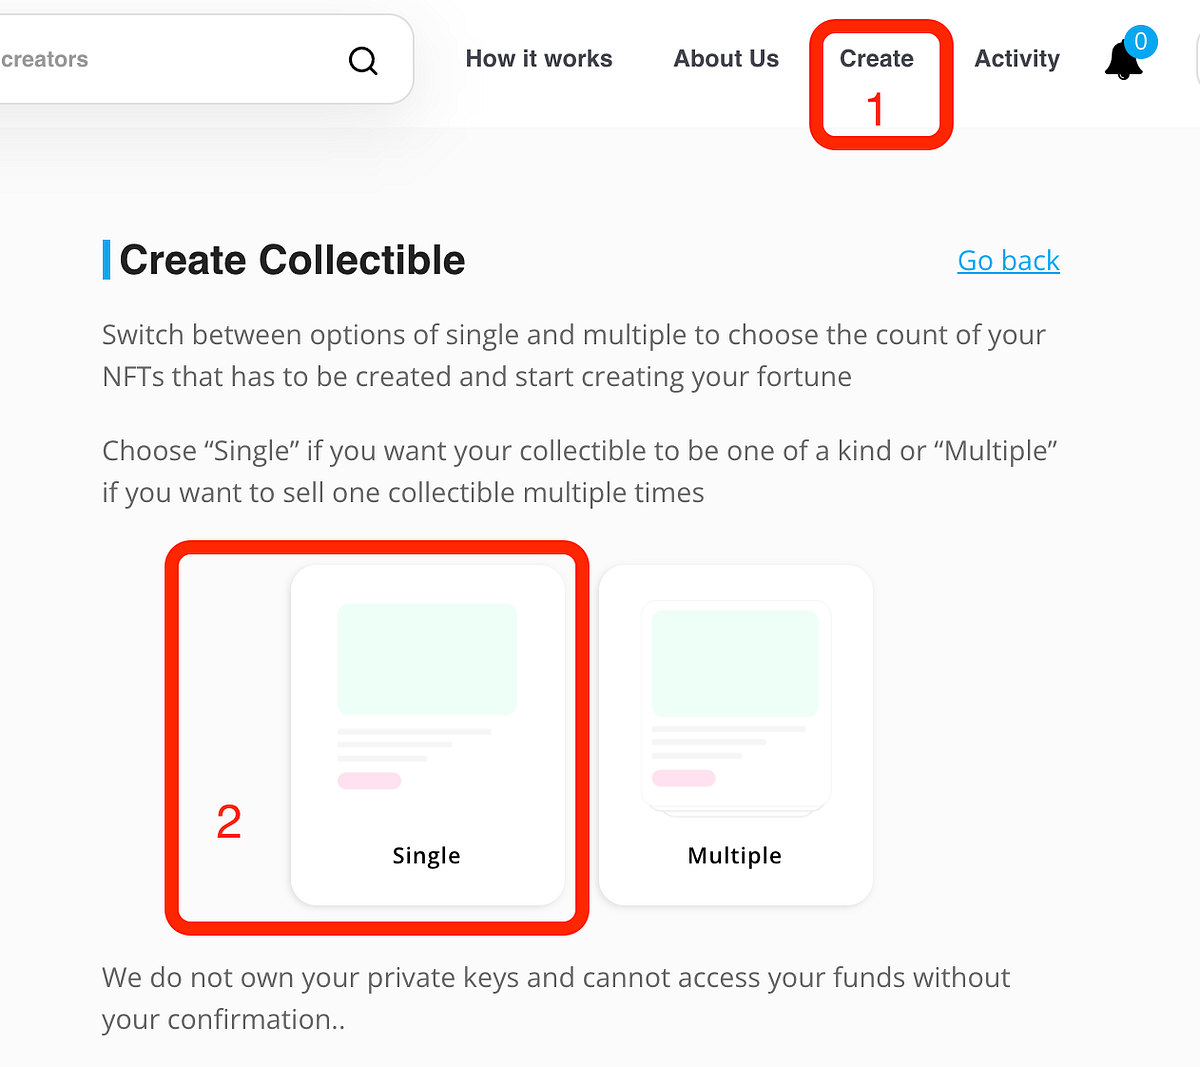
Locate the “create” tab at the top of our homepage and select “single” as the NFT upload option. There is also a “multiple” option if you wish to sell multiples of a single NFT.
First upload your chosen file format corresponding to the metaverse asset you’re creating.
A second upload box will appear allowing for a .gif or image file that accompanies your NFT to be uploaded.
Finish the form by filling out all of your assets details below.
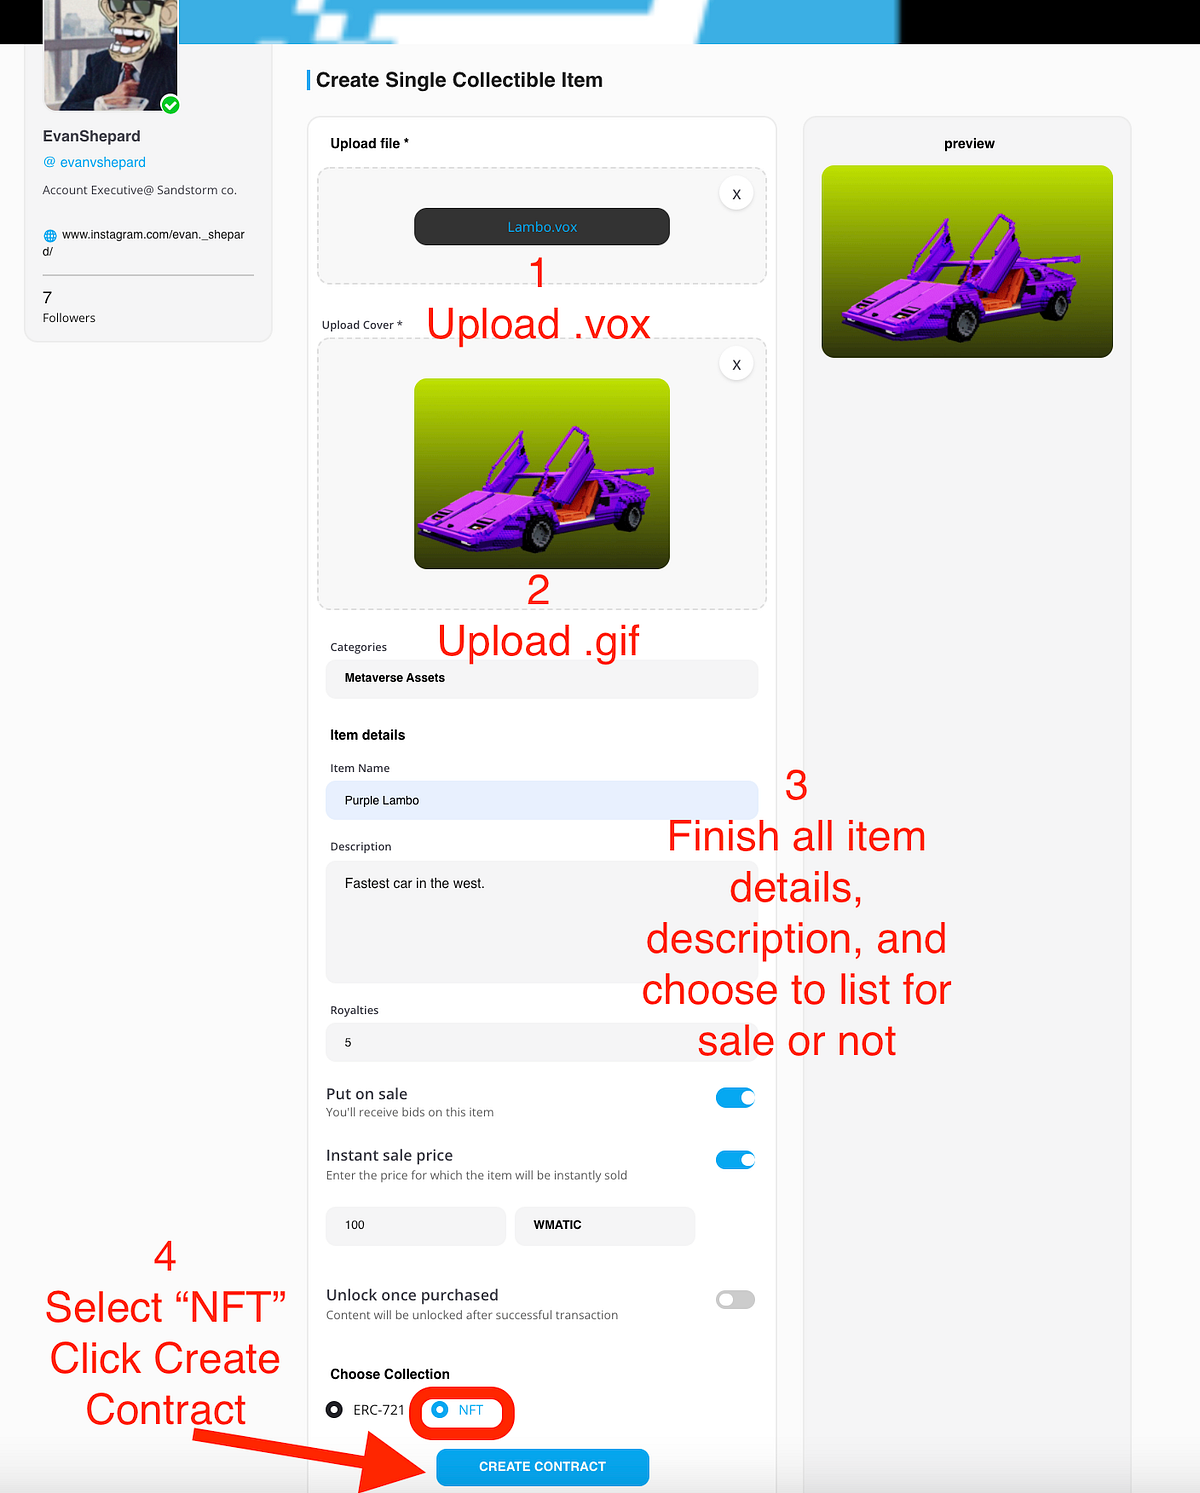

Select if you wish to receive royalties on all future sales of your asset, whether or not you want to list the item for sale, if so list a price.
Choose “NFT” as your collection type and then select the “Save Collection” button which will open your Metamask wallet for approval.
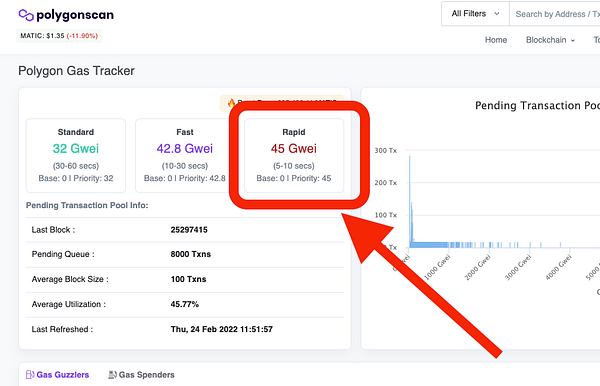
NOTE: You will need to increase your fees manually so that MATIC Polygon transactions do not time out and go through smoothly to the blockchain. Set fees to “HIGH” or manually enter the max priority fee and Gwei fields to higher amounts than the “rapid” fee on Polygon Gas Tracker.
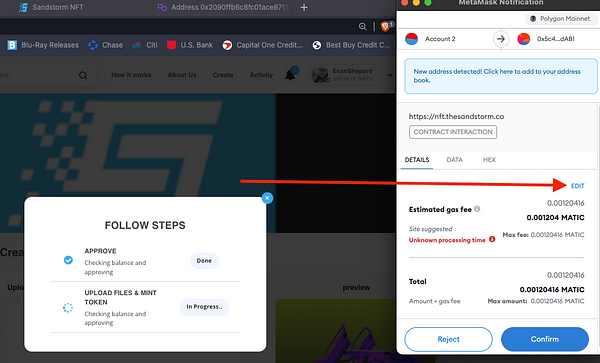
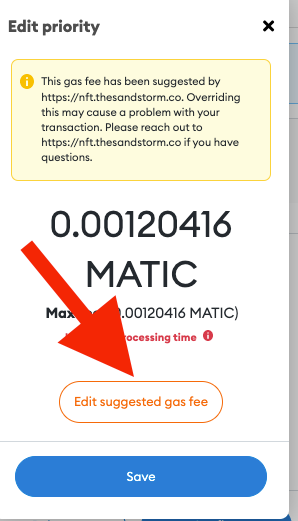


Set Priority Fee and Max Fee (GWEI) to over “Rapid” rate for high approval success.
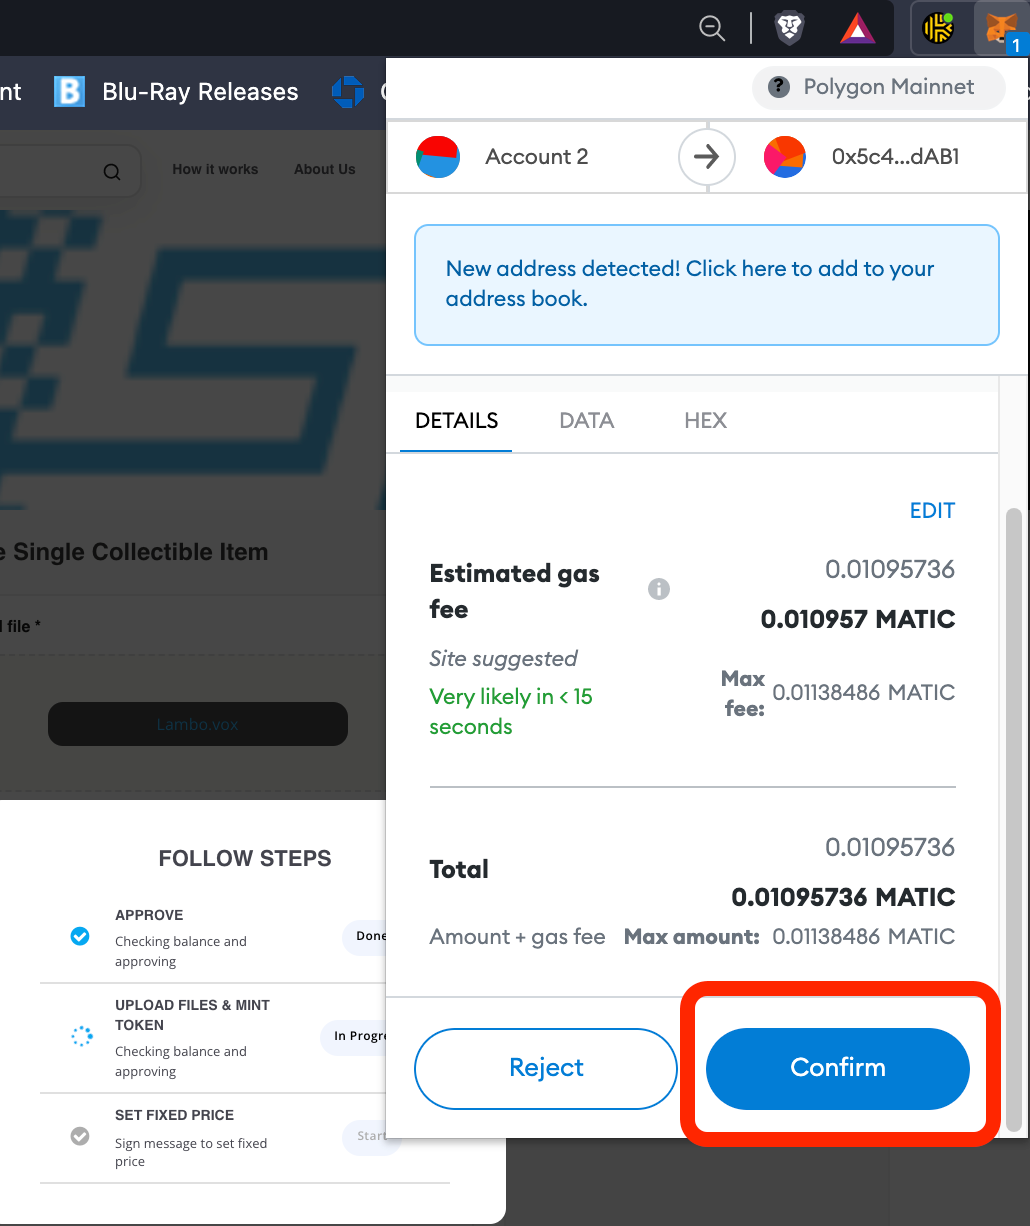
After the first confirmation wait ~10–20 seconds to bring up the “MINT” contract signature.
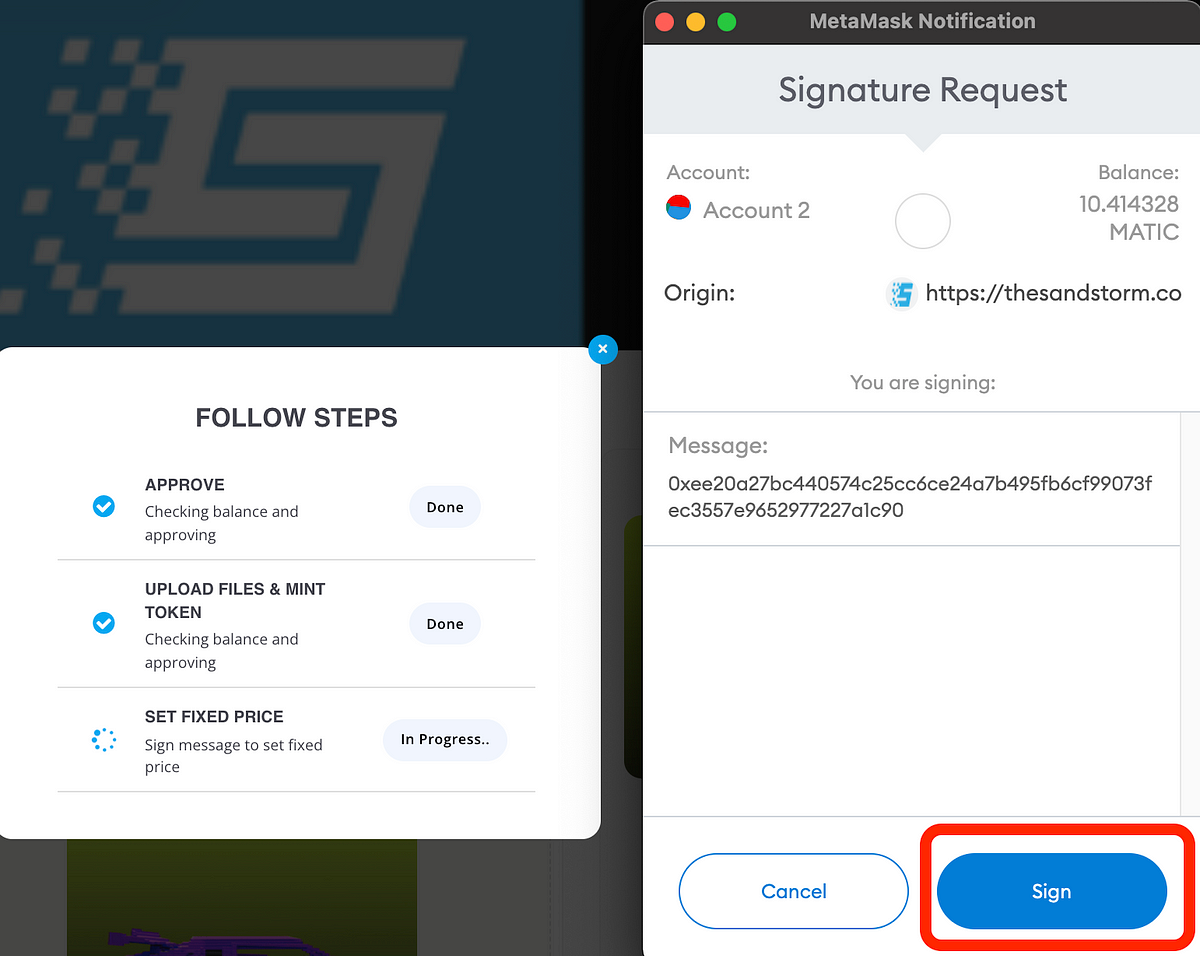
NOTE: Fees will vary based on network usage at the time of your MINT. Fees on the Polygon network are FAR cheaper than the ETH mainnet by comparison.
Step 5: View Your Newly Minted Asset
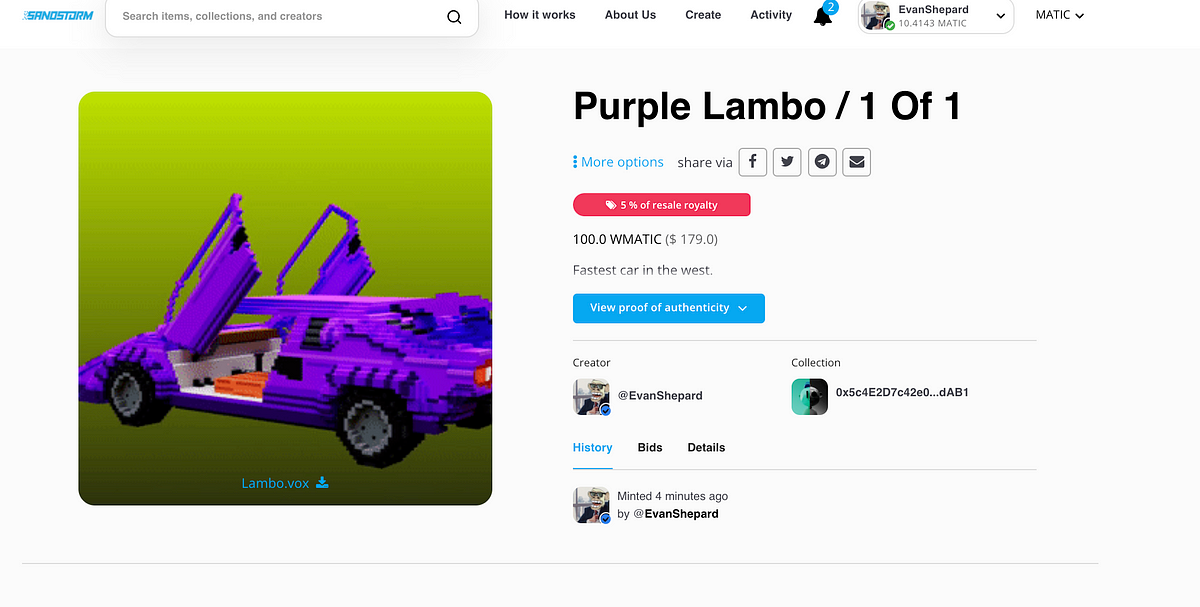
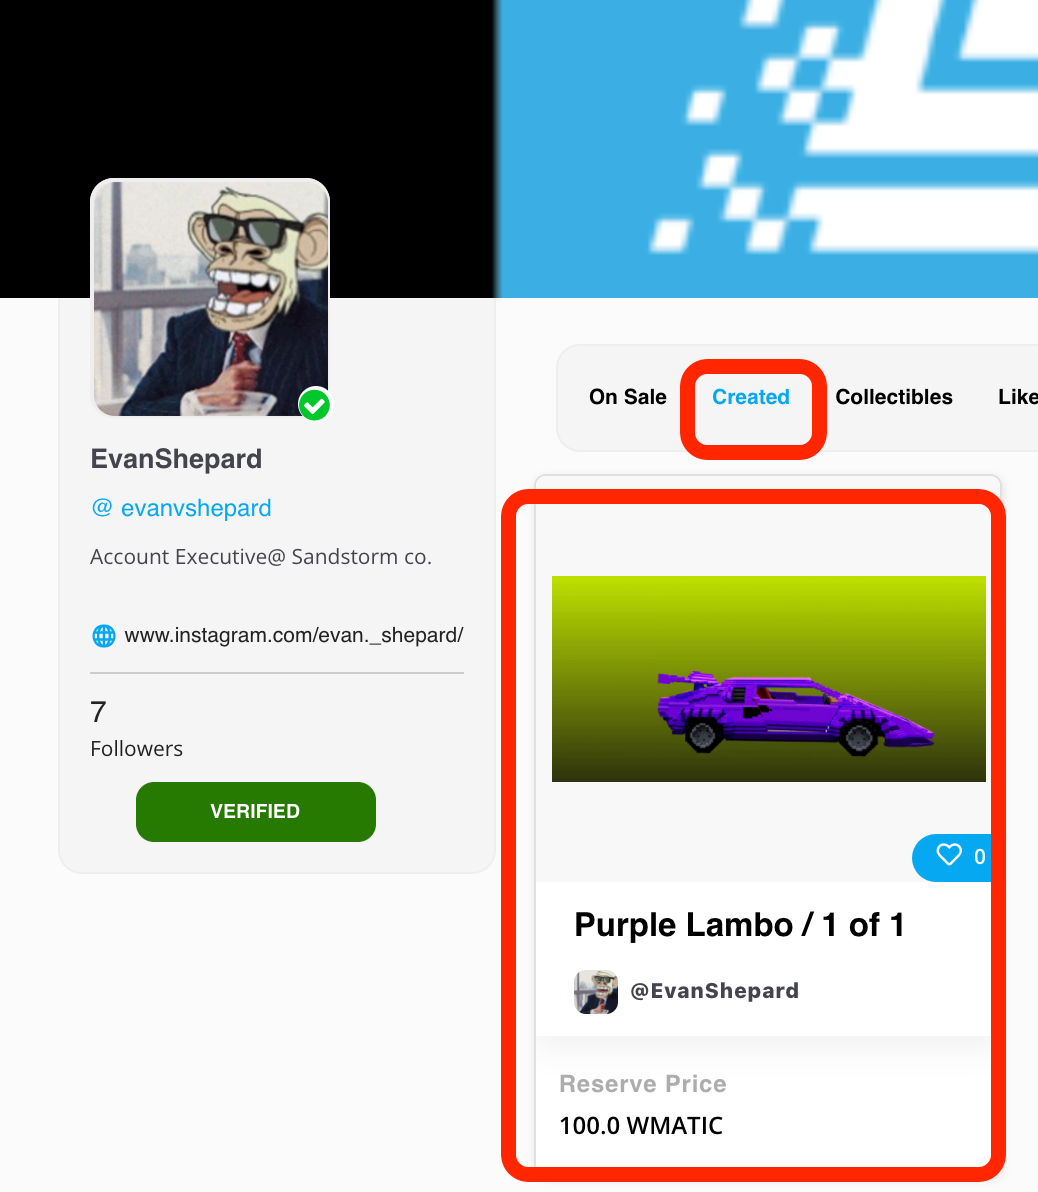
Congratulations! You have just minted an NFT asset to your Sandstorm Marketplace Profile. You can visit your profile and should now see your asset listed under the “created” tab.
